The PACScenter solution is enriched with several features and functionalities that always provide easier work for the radiologist and allow a much more fluid workflow in analysing medical imaging studies.
The MPR – Multiplanar Reconstruction or Multiplanar Reformation – is an advanced diagnostic tool which allows synchronising different planes, series and studies. Are you aware of these features? Keep reading to discover them all and see how easy it is to use them in PACScenter.
MPR synchronisation
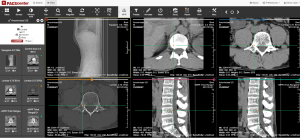
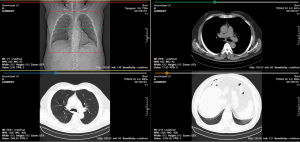
The MPR is enabled by default and, if the study has the reconstructed series, it automatically shows the synchronisation lines in red and green. In your visualization panel, the red lines define the limits and the green line represents the place where the selected image intersects with the displayed image.
In PACScenter, you have the following MPR functionalities:
- Enable sync with selected series;
- Enable sync with same orientation;
- Enable sync with previous studies;
- Pointer;
- Free MPR.
Sync with selected series
The tool synchronises with selected series will allow, as the name suggests, to synchronise only with the selected series. The position of other series remains the same and without any change.
To perform this action, simply click on the view containing the series that will be used to synchronise with, and that view will be highlighted within a yellow border. After this selection is made, there is only the necessity to navigate/scroll in the other series and the MPR synchronisation lines will be shown in the selected series.
MPR – Sync with selected series.
Sync with the same orientation
This tool can be used to enable synchronised navigation of series with the same orientation.
For instance, if you are navigating in a sagittal series, the other sagittal series will move to that position. For this, you only need to navigate/scroll in a series that wants to move the position and the other series that are in the same orientation will also move
Sync with previous studies
This tool allows you to synchronise the current study’s series with previous studies’ series.
To allow that option you will need two studies that could be synchronised, such as two CTs of the same patient. Then, you will need to drag the series of the previous study to the view, mark the study of the previous study and move to the same position of the current study.
After that, you can enable this option and move/navigate in the current series and the series of the previous study will also move to the right position.
Pointer
This tool allows to freely synchronise in any place and location of the image.
It will automatically move the other series to the correct position. You can move the location of the pointer with the mouse, an action that automatically moves the position of other viewing series to the correct position.

MPR – Pointer.
Free MPR
This tool will allow physicians to generate 2D slices with different view angles from an original series. Additionally, there is also a 3D view mode available when this tool is enabled. See the video below for more details on how to use the Free MPR.

